How do you know which 3D printer is best if you are just a beginner? It’s a debate that takes place every day on the forums. If you type this question into Google or Reddit, you will receive a variety of answers. You will likely hear from each different 3D printing community as to why their specific brand of printers is better than all the rest.
The truth is, all of the printers on this list are great printers. You could select any of them and start printing quality 3D builds. But based on our own experience and feedback from other users, we have selected our order for the top 4 that we feel would be best for a 3D print newbie. If you have not already, please take a look at our Read This First Before You Buy a 3D Printer. This will provide you with features you will want to consider as a beginner to buying a 3D printer for the first time.
We have received no incentives to select one printer over another. This is based solely on our own research and opinion. That being said, we have provided affiliate links if you find a printer that you like. Please read our disclaimer below.

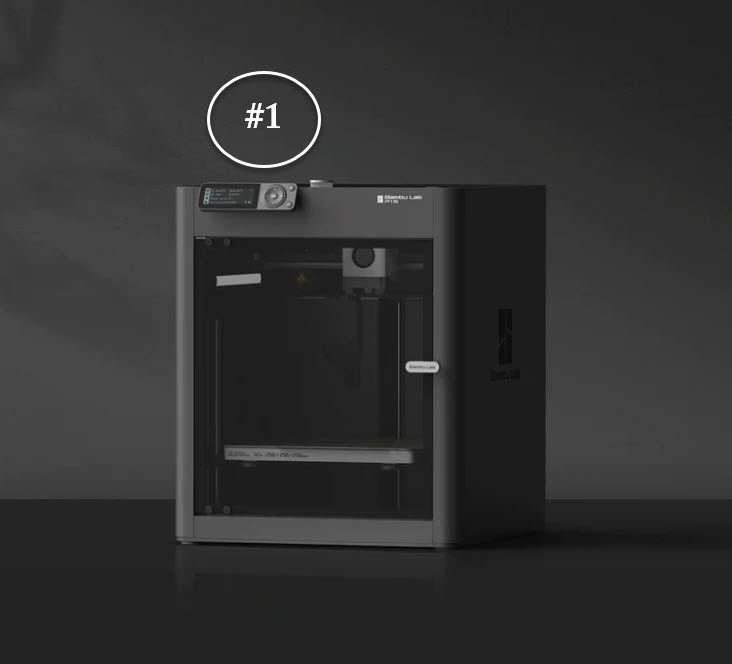
#1 Bambu Lab P1S
Our top pick is the Bambu Lab P1S which is a fully enclosed printer packed with features. It comes with auto leveling like many of the printers on this list to save you time and frustration as a beginner. It is also one of the quickest printers on the list with speeds up to 500mm/second. The nozzle and heated bed temps provide flexibility to print with a variety of filaments. We really like the camera feature so you can check in on your model and even do a timelapse. It’s the priciest model on the list for a reason. It’s worth the extra money though if you have it in your budget. The only reoccurring con for this printer is that users report Customer Service is not great. It is a very reliable and quality machine, though, so hopefully you won’t have a reason to contact them.
- Bed Size: 256x256x256mm
- Auto Leveling: Yes
- Heated Bed: Up to 100°C
- Speed: 500mm/s
- Nozzle Temp: 300°C
- Interface: 2.7” LCD screen w/control dial, Mobile App
- Enclosure: Yes
- Camera: Yes (includes timelapse)
- Features: Vibration compensation, Filament Sensor
- Initial Setup: 15 mins
- File Transfer: Wi Fi, Micro SD Card, Mobile App
- File Types: STL
- Slicer: Bambu Studio
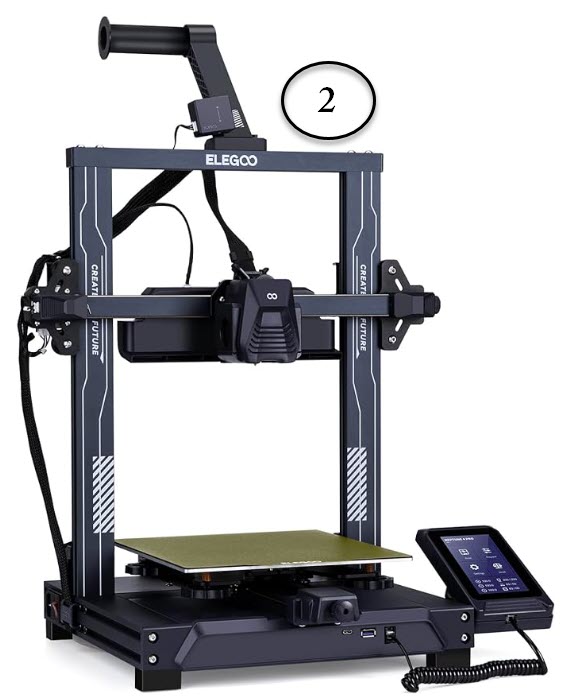
#2 Elegoo Neptune 4 Pro
Next up is the Elegoo Neptune 4 Pro with a very user-friendly printer. Elegoo has been synonymous with quality as their best-selling Neptune 3 is still listed near the top of many “best of” lists. The Neptune 4 Pro provides an upgrade which includes a faster print speed due to an improved firmware called Klipper. Recommended print speed is 250mm/second, which is very fast compared to other models in its class. The Neptune 4 Pro also features a unique segmented heated bed. The center will heat up for smaller prints while the outside will be reserved for larger prints to provide even heat throughout. The price is much cheaper compared to the Bambu Lab P1S. Some users stated the initial setup for the Elegoo Neptune 4 Pro can be a bit tricky (up to an hour). It may take a few prints to get the printer settings dialed in.
- Bed Size: 225x225x265mm (8.8×8.8×10.4in)
- Auto Leveling: Yes
- Heated Bed: Up to 110°C (Segmented – Center and Outside Heated sections
- Speed: 250mm/s (recommended speed)
- Nozzle Temp: 300°C
- Interface: Removable Touchscreen
- Enclosure: No
- Camera: No
- Features: Klipper Firmware for faster printing speeds, Print Resume
- Initial Setup: About an Hour
- File Transfer: USB/LAN/WIFI
- File Types: STL, OBJ
- Slicer: Cura, Orca
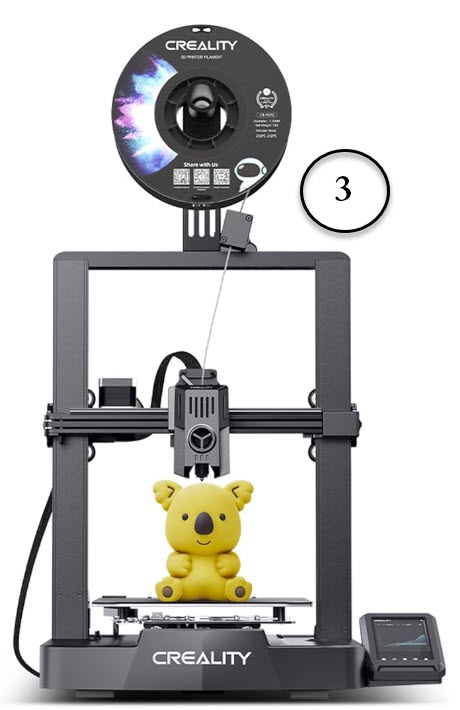
#3 Creality Ender 3 V3 KE
The Creality Ender 3 is one of the most popular 3D printers for beginners. The Ender 3 V3 KE checks in at #3 on our list. The Creality 3D community is very active. It’s easy to find online support for trouble with assembly or troubleshooting issues. You’re sure to find a YouTube video to help talk you down off the ledge. This printer is no slouch either. With safety features such as Power Loss Recovery, Filament Sensor and an optional AI Camera, it can stand its ground in this group of quality printers. The Creality splicing software can be challenging, so users recommend using Cura instead. The Ender 3 V3 KE is consistent, reliable and a little cheaper than the rest, making it a great first purchase for a 3D printer. With 4.5 stars on over 25K reviews, they must be doing something right.
- Bed Size: 220x220x240mm (8.7×8.7×9.8in)
- Auto Leveling: Yes
- Heated Bed: 100°C (212°F)
- Speed: 300mm/s (recommended speed)
- Nozzle Temp: 300°C (°F)
- Interface: 4.3 inch touch screen
- Camera: AI Camera (optional)
- Features: Power loss recovery, Flexible build plate, filament runout sensor
- Initial Setup: 15 mins
- File Transfer: USB/LAN/Mobile App
- File Types: STL/OBJ/3MF/AMF
- Slicer: Cura, PrusaSlicer, Creality
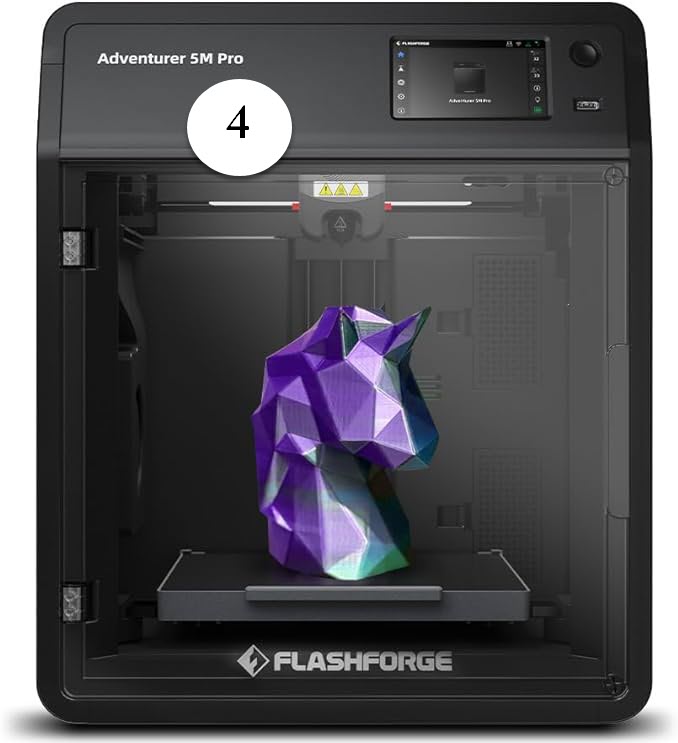
#4 Flashforge Adventure 5M Pro
Our final pick, is the Flashforge Adventure 5M Pro. With a maximum speed of 600mm/second, even the Flash will have trouble keeping up with this one. I’m just kidding, the Flash will be fine. Recommended speed for this printer is 300mm/second. The 5M Pro features an automatic shutdown, build-in camera and a dual air filtration system inside a fully enclosed system. Though it can travel at light speed, users recommend to slow it down to avoid your build from coming loose. There is also not as many troubleshooting tips available as there are with some of the other printers on the market.
- Bed Size: 220x220x220mm
- Auto Leveling: Yes
- Heated Bed: Up to 90°C
- Speed: 300mm/s
- Nozzle Temp:
- Interface: 4.3 inch touchscreen
- Enclosure: Yes
- Camera: Yes
- Features: Auto Power Off, Filament Detection
- Initial Setup: 10 mins.
- File Transfer: Micro SD Card, WiFi, Mobile App, USB
- Slicer: Multiple slicers supported including Cura
| Features | Bambu Lab P1S | Elegoo Neptune 4 Pro | Creality Ender 3 V3 KE | Flashforge Adventure 5M Pro |
|---|---|---|---|---|
| Price | $699.99 | $299 | $279.99 | $599 |
| Bed Size | 256x256x256mm | 225x225x265mm | 220x220x250mm | 220x220x220mm |
| Auto Leveling | Yes | Yes | Yes | Yes |
| Heated Bed | Up to 100°C | Up to 110°C (Segmented) | Up to 100°C | Up to 110°C |
| Print Speed | 500mm/s | 250mm/s | 300mm/s | 300mm/s |
| Nozzle Temp | 300°C | 300°C | 260°C | 280°C |
| Interface | 2.7″ LCD screen w/control dial, Mobile App | Removable Touchscreen | 3.2″ color screen | 4.3 inch touchscreen |
| Enclosure | Yes | No | No | Yes |
| Camera | Yes (includes timelapse) | No | No | Yes |
| Features | Vibration Compensation, Filament Sensor | Klipper Firmware for faster printing speeds, Print Resume | Auto Filament Loader | Auto Power Off, Filament Detection, Filtration System, Fibration Compensation, Resume Printing |
| Initial Setup | 15 mins | About an hr | 15 mins | 10 mins |
| File Transfer | Micro SD Card, Wifi, Mobile App | USB/LAN/WIFI | SD Card, USB | Micro SD Card, Wifi, Mobile App, USB |
| File Types | STL/3MF | STL/OBJ | STL/OBJ/3MF/AMF | 3MF / STL / OBJ |
| Slicer | Bambu Studio | Cura, Orca | Cura, PuraSlicer, OrcaSlicer, Creality | Cura |
As a 3D Print Newbie, which 3D Printer did I buy?
If you spend time on any 3D printing forum these days, you will likely hear the name Bambu Labs come up frequently. They currently have some of the most user-friendly 3D printers on the market which was a big factor in my decision to purchase a Bambu model printer. One of the most talked about printers right now is the X1-Carbon. My budget didn’t provide me the option to spend $1200 on just a printer.
I decided to cut that cost of my budget in half and purchased their P1S model which is the next step down from the X-1. The company also offers a lower priced printer, but I chose to pay the extra $100 for a plastic enclosure and a few other upgrades. I have kids and pets at home, so the enclosure will help with my peace of mind. Another factor for me was that the lower model, the P1P, was on back order when I tried to place an order and I didn’t want to wait 2 months to get it.
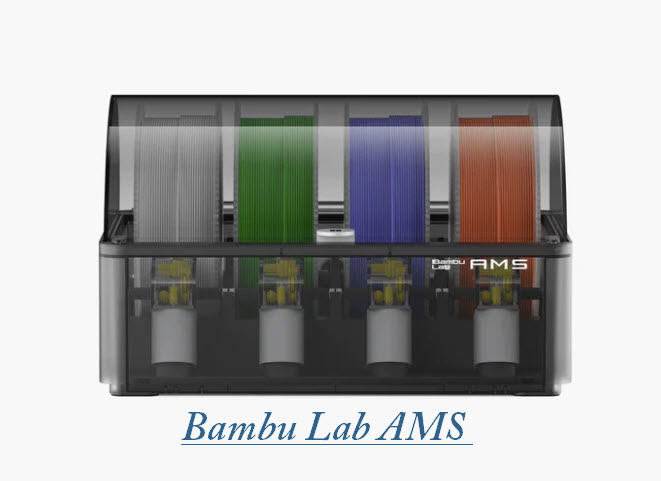
I chose to purchase an optional AMS (automatic material system) accessory pack with my printer (shown above). It was a filament enclosure that also allows you to easily print in multiple colors (up to 4 per pack) and includes automated filament changes. Essentially when one reel runs out, it would automatically switch over to the next one. I felt like this would be something I would be kicking myself later on if I didn’t buy it and I saved $100 as a bundle. How do you tell your wife that you just bought over $1100 worth of 3D printing materials? I suggest chocolate.
Not everyone is going to have the budget to spend a lot on a 3D Printer especially if you are hesitant to get started with 3D Printing. I had been thinking about buying a 3D printer for approximately 5 years. After conducting extensive research, watching YouTube videos, and reading lots of how-to guides, I decided I wanted to join the maker world of 3D Printing. I felt confident that once I got started, I wouldn’t want to stop.
The most important things I was looking for in a 3D printer was safety and reliability. I didn’t want to have to spend a lot of time putting it together or troubleshooting just to make it work. I wanted to spend the majority of my time printing and learning how to find or create designs.
What do you need to buy next?
Now that you have picked out your printer and know how much that will cost you, you’ll need to pick out some filament. Some printers come with test filament or a smaller reel. This will be enough to get you started but won’t last too long. Take a look at our Filament Buying Guide to learn more about what you should buy with your new 3D Printer.
